With the free WordPress plugin Yoast SEO ((search engine optimization) you optimize your WordPress website for search engines. But how do you set up this plugin of Dutch origin? In this article, we’ll explain step by step how you can set up your WordPress website for the ideal search engine optimization.
In this manual
1. Install Yoast SEO plugin
2. Yoast SEO Configuration Service
3. Fine-Tune WordPress for SEO
4. Fine-Tune Yoast SEO
5. Link Search Console
6. Resolve Notification Issues
7. Write Content
8. Content Strategy
1. Install Yoast SEO Plugin
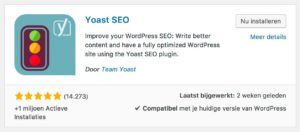
You’ll find the Yoast SEO plugin in the WordPress repository. In WordPress, go to Plugins -> New plugin and search for “Yoast SEO”. Click “Install now”, then click “Activate”.
2. Yoast SEO Configuration Service
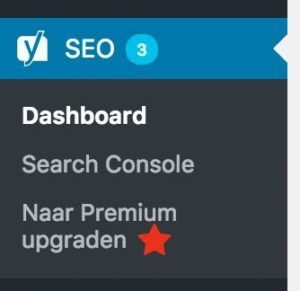
Now that the WordPress SEO plugin has been installed, you’ll see a “SEO” button in your WordPress menu on the left-hand side. Click it to open the plugin’s Dashboard. You’ll probably already see some notifications and warnings, but we’ll ignore these for now. First click the “General” tab at the top, then click “Open the configuration service“, and then “Configure YOAST SEO”.
You’ll now run a wizard that will help you set up a large part of your website for SEO (search engine optimization). Many of these steps are self-explanatory, but we’d like to comment on some of them:
2a. Company or person? (step 4)
At step 4 you’re required to fill out whether you’re a company or a person. In both cases, you can still fill out the name of your company/person. We recommend you include your most important search term in your company name. For example, if you are a carpentry business with the name “Johnson LLC“, then fill out “Johnson LLC Carpentry”. And if your name is Vanetta Smith and you write a personal website on recipes, then call yourself “Food blogger Vanetta Smith”. Copy this text right away, because you’ll have to fill it out a couple of times.
2b. Social profiles (step 5)
When entering your social profiles, do not think: the more, the better. Limit yourself to using two or three social media channels, that you use well, instead of using eight which you totally neglect. Consider the social media channels that are most suitable for your target group.
2c. Visibility of the post type (step 6)
In every WordPress website there are three default post types: Pages, Posts and Media. Some themes and plugins add extra post types. A properties plugin for real estate agents, for example, can add the post type “Houses” to the website.
At this step, you can set up exactly which post types should be indexed by Google and which should not. All post types that you don’t use for the conversion goals of your website, can here be set to “Hide”. This does not mean that they won’t be used on your website. But only that the search engines won’t be instructed to index such posts.
In case you don’t have a blog/news archive, but only a few static pages, you can hide the post type “Posts”. The same often goes for media; the media library on your website is probably not setup with the purpose of attracting traffic that increases conversion; usually these media are used to, for example, placing images in your pages and posts, in which case you can simply hide “Media”.
In fact, some plugins put their settings in a post type. In that case, you might see something like “Extended framework” as a post type. If you have no use for this, then hide this too; the more unnecessary post types you hide, the better the other types will be valued by the search engines. Obviously, you’ll want to make sure you don’t accidentally hide a post type that you do need. Because then you’ll be throwing away a lot of valuable information for the search engines.
2d. Title settings (step 9)
At this step, you can fill out the website name. Here, you paste the text that you copied at step 4, or fill out your activities, and maybe even your location. For example, “Rotterdam Lawyers Friesinger & son”. Or “Architect Anna van der Molen”. You’ll need this text again later in this manual, so be sure to copy it again.
3. Fine-Tune WordPress for SEO
Now that you have run the configuration service, you’ll arrive back at the Yoast SEO plugin Dashboard. You’ll probably get some more notifications at this time. You can keep ignoring these, because first we’re going to run through some WordPress settings, that will probably resolve a large portion of these notifications.
3a. Site title and subtitle
Now, in WordPress go to Settings -> General. At the top, you’ll see the site title and subtitle. Many people use the name of their website or organization as a site title. This seems logical, but if you want your website to be easy to find in the search engines, it’s better to put your activity here, just like you did in the configuration service. So, again paste the title that you’ve used at step 2a and 2d here, e.g. “Furniture manufacturer New York – Donald McMillan”, or “Antique children’s toys – Web store ToyToy”.
Very often, the subtitle is still the default WordPress text: “Just another WordPress site”. Remove this line and enter a short description of your website. Try to use keywords that apply to your entire website and keywords that you want to lead visitors to your website. For example: “Web store for remanufactured chassis parts for Volkswagen Beetle.”
Now that you are on this page: be sure to scroll down and check if your website language is set correctly. Is your website in Spanish? Make sure your website language is also in Spanish. Because the language is also picked up by search engines. It says something about your target group.
Finally, click “Save changes”. Save or copy the title and subtitle, because you’ll need them again later.
3b. Update services
In WordPress, go to Settings -> Write. At the bottom of this page you’ll find a field to “Update services”. These are external webservices that need to be informed when you’ve made changes to your website, e.g. when you’ve written a new blog, or made changes to one. This makes sure that search engines are almost immediately informed of your new content, so they’ll include it faster in their search results. Make sure it says: “http://rpc.pingomatic.com/” under “Update services”. If it doesn’t, then paste this URL here. Pingomatic is an update service that informs all large search engines of your new content, so you don’t have to. Usually this is configured correctly, but it never hurts to check.
3c. Search engine visibility 
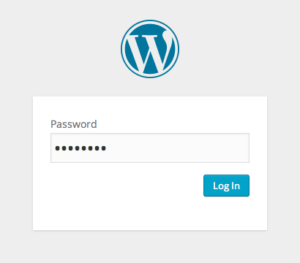
In WordPress, go to Settings -> Read. At the bottom of this page, you’ll find the “Search engine visibility” option. Make sure this box is unchecked, otherwise your website will actively inform search engines to NOT be included in the search results. Are you developing a website, or do you have a website that you, in fact, do NOT want showing up in search engines, then DO check this box. By the way, this is not a completely safe guarantee that your website will not show up in any search results; if you really don’t want to be found, it’s best to secure your website with a password. You can do this with a free plugin such as Password Protected.
3d. SEO for comments on your WordPress website
In WordPress, go to Settings -> Comments. Here, you can change the settings for comments on your website. It may seem strange to include this topic in a manual for SEO, but we’ve done this for a good reason. After all, comments on your website are content too! So, ask yourself whether comments on your website will help you be more findable to search engines, or that they would only add less relevant information to your webpage. If you’ve noticed that the comments on your articles lead to irrelevant conversations and discussions, then it might be better to turn off the option to leave comments on your website, or decrease the amount of comments under your blog. Or maybe you’ve seen that your blogs rarely get comments. In that case, you also better turn off the option to leave comments, because it makes your pages more compact. And with less irrelevant content, the rest of the content gets valued more by search engines and your visitors.
3e. Permalinks
With permalinks you configure the structure of your website’s URLs. This is very important for the SEO (search engine optimization) of your WordPress website, because the structure of a URL says a lot about the content of its page. As the term implies, permalinks are permanent; you configure them once, and then you never look at them again. Anyone who links to your website (search engines, social media, friends, etc.), will link to the URL as configured in your permalink.
In WordPress, go to Settings -> Permalinks. The default general permalink settings are year, month, day and name. This will result in URLs like www.furnituremanufacturer-newyork.com/2017/08/12/sanded-wood-with-discount/. But these data are probably not at all what you want in your URL. What you do want is to include the most important category of your blog in the URL (e.g. “Sale”). This way, you could get a URL like this: www.furnituremanufacturer-newyork.com/sale/sanded-wood-with-discount/. You can configure this, by choosing the “Customized structure” and then typing: /%category%/%postname%/.
Under the general settings, you’ll also find the “Optional” button. Below this, you’ll be able to change the category and tag archives structure. The permalink of the archive for the category “Dinner tables” by default would be: www.furnituremanufacturer-newyork.com/category/dinnertables/. But the word “category” is not relevant here (and thus a distraction for the search engines), so you could choose another word instead, for example: “furniture”. Please note that the category structure is the same for all categories; so, the “Sale” category archive will get the URL: www.furnituremanufacturer-newyork.com/category/sale/. In case you don’t know any good category structures, you can also turn it off altogether (see step 4e).
You’ll probably use several categories for most of your articles. The Yoast SEO plugin gives you the option to set one primary category, so that one will always be used in the permalink. To do this, click “Make Primary” next to the most relevant category, when creating/editing a post.
If you change the permalink structure afterwards, a lot of old links will probably become obsolete. This has great consequences for your findability; search engines don’t like it when pages in their search results are suddenly unreachable. It will cause you to drop fast in their search results. So, when you change your permalinks, check to see if existing links still work in the search engines. If not, then install a plugin like WordPress Ultimate Redirect Plugin ($ 29), that will automatically try to redirect as many “not found” pages (or 404 pages) to the right page. It’s like saying to the search engines: “The current page still exists, but has been moved to this new URL”. That way you transfer the accumulated value in search engines to the new pages on your website, and search engines will gradually adjust their index to your new permalink structure.
4. Fine-Tune Yoast SEO
Now that WordPress has been set up correctly for SEO (search engine optimization) and the basics for Yoast SEO have been configured, it’s time to do some fine-tuning in the Yoast SEO plugin.
4a. Activate advanced settings
To unlock additional functionalities in Yoast SEO, we first must change some settings. To do this, go to WordPress, SEO -> Dashboard and click the “Features” tab. Set the “Advanced settings pages” to “Enabled”. Then click the “Security” tab and also enable the “Advanced section of the Yoast SEO metabox”. Now click “Save”. In the menu on the left-hand side, under “SEO” you will now see additional options.
4b. Titles and metas
Titles and metas, are the title and description of a page/post, just as they are communicated to search engines. With this, you actually tell the search engine: “When you include this page in your search result, then show this title and description.” It’s obviously up to the search engine to do what they want, but if you use relevant texts, your request is usually honored.
Using good Titles and metas is very important, because you use them to give a first impression to your potential visitors, even before they visit your website. So, make sure you have attractive, relevant texts. The title is also shown in the tab/title at the top of your browser screen when visiting that specific screen.
Click “SEO” -> “Titles & metas” and open the “Homepage” tab. Here, you enter the title and subtitle that you’ve also filled out at step 3a. If you want, you ![]() can change the subtitle a little, by adding a call to action, to make it even more attractive to click on. For, example, if your subtitle is: “Web store for remanufactured chassis parts for Volkswagen Beetle”? Then your meta description could be: “Web store for remanufactured chassis parts for Volkswagen Beetle? Ordered today, delivered tomorrow!”.
can change the subtitle a little, by adding a call to action, to make it even more attractive to click on. For, example, if your subtitle is: “Web store for remanufactured chassis parts for Volkswagen Beetle”? Then your meta description could be: “Web store for remanufactured chassis parts for Volkswagen Beetle? Ordered today, delivered tomorrow!”.
Now click the “Post types” tab. Here you’ll see the visibility for the post types, as you’ve configured them at step 2c. Good to know, if you ever have to change this in the future. Here, you can leave the title and meta templates as they are, because we’ll configure these per article/page later in this manual.
Now, click the “Taxonomies” tab. Taxonomies is the umbrella term for both categories and tags. So, on this tab you’ll find all the categories/tags of your WordPress website. Every taxonomy has an archive page in WordPress. It is passed on to search engines by default. Just like with the visibility of the post types (step 2c) you must ask yourself here which categories/tags you actually use. So, for example, if you have added no tags at all to your posts, then set the “meta robots” for that taxonomy to “noindex”. This way, you tell the search engines, that the archive pages for that taxonomy don’t have to be included by the search engines; because they are not relevant pages.
For the taxonomies that you do use, you can check out the title templates. By default, they are set up as follows: %%term_title%% Archives %%page%% %%sep%% %%sitename%%. The title for a post category called “Sale” would then be sent to search engines like this: “Sales Archives – Furniture manufacturer Rotterdam – Pieter de Heuvel”. Which is fine, but there’s room for improvement. If you make sure all your categories for this taxonomy are consistent, then you can change the template to for example: %%term_title%% of %%sitename%% %%sep%% %%page%%. With categories like “Sale” and “Portfolio” you’ll get nice-looking titles: “Sale of Furniture manufacturer New York – Donald McMillan”, or “Portfolio of Furniture manufacturer New York – Donald McMillan”. The meta description template can best be left empty here, we’ll run through that later on in this manual.
Now, click the “Archives” tab. Here you will see some additional options for archive pages generated by WordPress next to the taxonomies. Such as author pages, date archives, etc.
Author archives show all articles per author. This is usually unnecessary, because for search engines it is rarely relevant who wrote the article. In fact, author archives are only useful when you work with several well-known authors and you want to build up findable archive pages for them. For example, the Youp van ’t Hek columns on the NRC (news) website. You can probably turn off your Authors archives, though.
The same goes for date archives; these show all articles published on your website during a certain period (e.g. January 2017). Unless you publish news messages that actually describe current events, you can turn off these archives; your archive pages for taxonomies probably offer much more relevant content than this kind of archive pages.
You’ve now configured quite a lot, so don’t forget to hit “Save”!
4c. Social SEO
Go to SEO -> Social. Here, you’ll find an overview of the social media accounts you added at step 2b. Run through the various tabs and fill out all the required information for the social media that are relevant for you. The rest of the precompleted settings in these tabs are all perfectly set, so you don’t have to look at those.
4d. Sitemaps
Now go to SEO -> XML Sitemaps. Sitemaps are XML files, automatically generated by Yoast SEO, that give search engines a structured overview of all content on your WordPress website. Make sure that the settings under the “Post types” and “Taxonomies” tabs include only in the sitemap what you’ve configured as visible at steps 2c and 4b.
4e. Advanced
Now go to SEO -> Advanced. You start off at the “Breadcrumbs” tab. A breadcrumb trail shows on which page you currently are in the tree view of the entire WordPress website. Many WordPress themes already have a built-in crumb trail, but in case yours doesn’t, it is best to archive it here. You do, however, have to make some adjustments to your WordPress theme, so a little PHP knowledge is required.
When activating the breadcrumb trail, delete the text after “Prefix for Archive breadcrumbs”. And at the bottom, at “Taxonomy to show in the breadcrumb trail of the post types” select for each post type the richest taxonomy for that post type. When I say “rich”, I don’t necessarily mean the taxonomy containing the most terms, but that the terms in that taxonomy are full of posts. Categories are usually richer than tags; an average tag maybe contains two or three posts, an average category probably ten to twenty. Finally, click “Save”.
Then, click the “Permalinks” tab. In this tab Yoast SEO can make a few more changes beside the changes you’ve made to the permalinks in WordPress at step 3e. This way, you can turn off the category structure if you couldn’t think of any good category structures at step 3e.
Enable “Redirect attachment URLs to parent post URL” to prevent visitors from directly going from a search engine to one of your website’s attachment pages (usually containing only an image and a title). This feature makes sure that visitors are sent to the corresponding page where the attachment is used. This is generally more relevant.
Finally, under “Clean-Up Permalinks” choose “Remove” under “Stop words in the slug”. This way, words like “the”, “a” and “an” are automatically removed from your permalink when writing new articles. The rest of the advanced settings are good, so now click “Save changes”.
5. Link Search Console
You can link the Yoast SEO plugin to your Google Account. This way, you can load relevant SEO information and resolve warning notifications on the website. Go to SEO -> Search Console and click “Get Google Authorization Code”. Follow the steps, paste the code and click “Authenticate”. You then get an overview of the pages of your website that cannot be found by Google, but that are linked to on other pages (or used to). You can run through this list and check to see if you can restore them (by changing the permalink of a page, or by making redirects to the correct page).
6. Resolve Notification Issues
Go back to the Yoast SEO plugin Dashboard. Maybe you’re still getting a few notifications. These notifications point to your WordPress settings that need to be resolved to further optimize your website for search engines. Do not click the close icon on the right, but click the link on the notification. You’ll then be directed to the right page for the WordPress settings.
In the above-mentioned example, you’re redirected to the WordPress Customizer, where you can enter your site title and subtitle under “Site Identity”. By the way, if you’ve been following the steps of this manual, you’ll probably not get this notification, because we’ve already fixed this problem.
Resolving notifications is something you can do on a regular basis. The Yoast SEO plugin gives you a clear overview, so if you schedule this once a month, it’ll cost you very little time.
7. Write Content
Your website is pretty much set up for Yoast SEO. But you can still fine-tune Yoast SEO per page, post, category and even per tag. We’ll start with fine-tuning posts and pages.
7a. Titles and permalinks of your WordPress articles and pages
After typing the title of your post, WordPress automatically generates a permalink for you. This is not always the permalink you want, and sometimes you change the title afterwards, but the permalink stays the same. The main rule is: you can easily change your permalink as long as you haven’t published your post yet. Then, you best leave the permalink as it is.
What is a good permalink for your post or page? You only need to include the most important keywords. Say, as a furnituremaker, you’re writing an article in the category “import” called “Strong quality improvement of imported wood from Italy”, the permalink automatically ends with: “/import/strong-quality-improvement-imported-wood-from-italy/”. This can be made shorter and more relevant; the words “import/imported” are duplicates and some of these words are not relevant for the slug. How about: /import/quality-improvement-wood-italy/? Much better.
7b. Configure the Yoast SEO metabox
When you’ve finished writing your article, there’s a new block “Yoast SEO” under your text editor. Here, you’ll see an example of how Google will probably show your page in the search results, based on your title, permalink and text. An example of such a snippet below.
The content of this snippet is based on the settings we’ve configured in the previous steps. However, it is possible to make a few more adjustments for this particular article. In the above example, we see that the title is too long for the box, and the description underneath is too. Click “Edit Snippet” to change the title and description. By making the title and the meta description a bit shorter and more attractive, we’ve created a snippet that looks nice in Google:
You can edit the snippet for each and every post or page that is important for you in the search results. Also, you can edit your categories and tags to see per category what a similar archive page will look like in search engines. To do this, go to Posts -> Categories (or Tags) and select a category. At the bottom, you’ll find the Snippet. You can, for example, give the category “Import” a nicer description:
7c. Focus keyword
Under every snippet you’ll also find a “Focus keyword” field. Here, you can enter the most important keyword of the page. Under the focus keyword, the SEO plugin gives you an analysis of the page, containing suggestions to make improvements. Mind you, it is a technical tool; always ask yourself if the suggestions make sense. The analysis of an article with the focus keyword “jerseys” can turn out wrong, because the words “jersey” and “sweater” won’t be recognized. So, use the analysis as a guideline, not as hard facts. Furthermore, it is good to know that the focus keyword is only a personal analysis; the focus keyword won’t be sent to search engines as a search term, nor is it embedded in the code of your page.
7d. Cornerstone articles
When you’re editing pages or posts, there’s another option under the focus keyword: mark the article as “cornerstone content”. Cornerstone articles are the most important articles on your website. The ones you really want everyone to read. Say you write a lot of articles on the different aspects of DIY woodworking. But there is one article about the complete process of woodworking. In that case, this article is a cornerstone article; in a way, all the other articles are related to this main article. By marking the main article as a cornerstone article, Yoast SEO will make new suggestions; are there enough links to this article? And do these links contain the most relevant keywords for this article?
An average website can contain about five cornerstone articles. Choose them carefully and ask yourself; can I link to these cornerstone articles from all the other (non-cornerstone) articles? And make sure you do this; after the introduction of a non-cornerstone article, make a quick reference to the cornerstone article.
8. And from Now on: Content Strategy
If you’ve made it all the way to the end, your WordPress website has a great configuration for SEO! But you’re just getting started; make sure your website stays attractive, relevant and up to date. You do this, by regularly writing articles on topics related to your website. Make a content strategy and schedule, for example, one day a month to write and publish a good article.