
At WpUpgraders we work with WordPress every day. And every day, we try to keep each other on our toes by sharing new tips and discoveries about WordPress with each other. We also like to share these things on our blog. So, here we have five tips for WordPress you (possibly) did not know.
1. Two-factor authentication for WordPress

Many people are still using unsafe passwords on the internet. This increases their chances of being hacked enormously, because hackers can easily find out your passwords through automated guessing. Two-step verification demands two actions before successfully signing into your account, for example, using a password and entering a code you have on your phone. So if a hacker where to ever guess your password, he would still be unable to sign in, because he would need your phone for the second step.
You can get two-factor authentication for WordPress for free with the Google Authenticator plugin. On your smartphone you install the Google Authenticator App, which generates the code you need to enter after logging in. After having completed these two steps, you get access to the WordPress admin. There’s a payed alternative for Google Authenticator called Duo.
2. Selecting several messages or pages at once
Sometimes you have to select a whole list of messages or pages in WordPress at once, to edit or remove them. Did you know you can select more
than one message at the time by pressing and holding SHIFT? Then you press and hold CTRL (or CMD on a Mac) which allows you to check and uncheck individual messages.
This way you can quickly move several messages or pages to trash at the same time.
3. Ping-o-matic
Maybe you’ve never heard of Ping-o-matic, but every WordPress user is using this free service. It informs search engines when you publish a message or page. This way, search engines can include your update in their search results almost immediately after you’ve posted it.
But you don’t always want this to happen right away. Maybe you want it to be included in the search results a bit later. In this case, it’s good to know that you can easily deactivate these notifications to Ping-o-matic. In WordPress you go to Settings > Writing and you remove the address http://rpc.pingomatic.com/ from the text field below ‘Update Services’.
Please note that you only prevent your messages from being sent to search engines immediately. Your messages will still be indexed, but at a later time (because search engines also visit your website on their own). Do you not want your website to appear in the search results at all? Then go to Settings > Reading and check the box at the bottom: ‘Discourage search engines from indexing this site’.
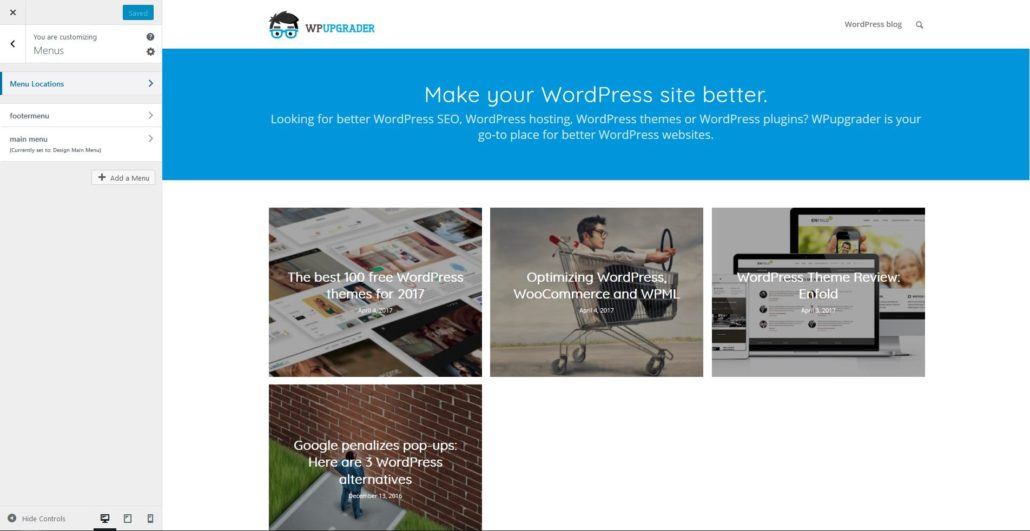
4. Preview your Widgets and Menus
When editing a blog or page, you can click on ‘Customize’ to see a preview of what your changes are going to look like, before publishing them and making them visible to visitors. But how do you do this with Widgets and Menus?
Since WordPress 4.3 it’s possible to preview the changes you’ve made to your Menus and Widgets. In WordPress, go to Appearance > Customizer to see your website with an extra sidebar on the left. You can just click through your website; the sidebar stays visible. In the Customizer, you click on Menus or Widgets and make the changes you want to make. You immediately see the effect of the changes you’re making to your website. When you are satisfied with the result, you click on ‘Save’, after which your changes will be published.
5. Pasting hyperlinks in a text
When you write many blogs, you will probably sometimes link to other websites. The usual way to do this in WordPress is by selecting the desired part of the text, clicking on the link icon, entering the URL, and clicking on ‘Add link’. But did you know there is a faster way?
Usually you’ve already copied the URL to which you want to direct your reader. Now select the text you want to use as a link and press CTRL-V (or CMD-V on a Mac).
Your selected text will now become a link to the address you had copied earlier. Easy peasy!
Do you have any good tips? Please tell us below!
End Note – Our WP Upgrader WordPress Plugins
Explore our custom-developed plugins to elevate your WordPress site: GDPR Consent for effortless GDPR compliance, WooCommerce Related Products by Attributes for optimized e-commerce functionality, WP Monitored Updates for streamlined automated updates, and Automatically Tag Posts and Pages for WordPress to enhance tagging and indexability.